
Bees play an important role in gardens and ecosystems, helping pollinate flowers, plants, fruits, and vegetables. But during hot weather, bees also need access to water to stay hydrated and support their colonies.
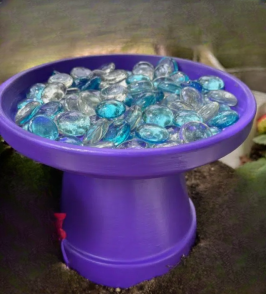
One simple way to help is by creating a small bee watering station using marbles and a shallow dish.
This easy DIY project is inexpensive, beginner-friendly, and can become a thoughtful addition to any garden, balcony, or outdoor space.
Why Bees Need Water
Just like other living creatures, bees need water to survive.
Water helps bees:
Stay hydrated
Cool their hive during hot weather
Mix and dilute stored food
Support the needs of the colony
During warmer months, natural water sources may dry up quickly, and some common water spots can actually be unsafe for small pollinators.
Deep birdbaths, buckets, or puddles can make it difficult for bees to land safely without falling into the water.
That is why shallow watering stations are so helpful.
Why Marbles Work So Well
The idea behind using marbles is simple.
The marbles create small landing spots where bees can stand safely while drinking water. Instead of trying to balance on slippery edges or deep water surfaces, they can rest directly on the marbles while staying dry and stable.
This greatly reduces the risk of drowning.
The colorful marbles also make the station look decorative and visually appealing in the garden.
What You Need
You only need a few simple items:
A shallow bowl, plate, or saucer
A handful of marbles or small stones
Clean water
That’s it.
Many people use old dishes or containers they already have at home, making this a low-cost and environmentally friendly project.
How to Make the Watering Station
Step 1: Choose a Shallow Container
Pick a shallow dish or bowl wide enough for bees to land comfortably. A saucer or small plate works well.
Avoid deep containers where insects could become trapped.
Step 2: Add the Marbles
Spread marbles or small stones across the bottom of the dish.
Leave enough space between them for water to collect while still giving bees safe places to stand.
Step 3: Add Water Carefully
Pour in just enough water so that the marbles remain partially above the surface.
The goal is to create shallow access points, not fully cover the marbles.
Step 4: Place It in the Garden
Set the watering station somewhere quiet and sunny near flowers or plants bees already visit.
Try to avoid areas with heavy foot traffic or strong wind.
Simple Maintenance Tips
Bee watering stations are easy to maintain.
Check the water level regularly, especially during hot weather when evaporation happens quickly.
You should also:
Replace dirty water
Remove leaves or debris
Rinse the dish occasionally
Refresh the water often during summer
Keeping the station clean helps create a healthier environment for pollinators.
Other Insects May Benefit Too
Bees are not the only visitors likely to use the station.
Butterflies, ladybugs, and other beneficial insects may stop by for water as well. This can help encourage biodiversity and create a more pollinator-friendly outdoor space.
A Small Action That Helps Nature
Projects like this may seem simple, but small efforts can still make a meaningful difference.
Creating safe spaces for pollinators helps support gardens, local ecosystems, and plant growth. It also encourages greater awareness about the importance of bees and other helpful insects.
For families, it can even become a fun educational activity for children interested in gardening or nature.
Final Thoughts
A bee watering station with marbles is a simple and creative way to support pollinators while adding charm to your garden.
With only a shallow dish, a few marbles, and fresh water, you can create a safer place for bees to rest and hydrate during warm weather.
Sometimes the smallest additions to a garden can make the biggest difference for the wildlife around us.
Leave a Reply